Most machines sold as heavy duty are ordinary machines with a sticker. That is not a knock on the category, it is a warning about the word. A heavy-duty sewing machine earns the label in two places, the frame and the motor, and neither one helps you if the needle, the thread, and the presser foot are set up for quilting cotton.
I teach beginners, and the first thing we do in class is not sew. We set up a machine for the fabric sitting on the table in front of us. Denim and canvas are not harder to sew because they are thick. They are harder to sew because every setting that works on cotton poplin is wrong for them, and the machine tells you so with a skipped stitch or a snapped needle.
This is the setup workflow I run before any project with real weight to it, plus the two machines I would hand someone who sews denim, canvas, and costume-weight fabrics often enough to want a machine built for it.
Why you should trust me
I have been a costume seamstress for twelve years, and I teach beginner sewing classes on the side. I have sewn Renaissance fair gowns, school play costumes for a building full of kids, and more Halloween capes than I can count. I keep a seam test journal for every machine I use: five fabric types, three stitch lengths, and a verdict on whether I would trust it on a paid costume.
My standards are boring and consistent. Straight stitch quality is the whole game, and everything else is convenience layered on top. The tension dial should mean something when you turn it. The buttonhole tells you more about a machine's brain than its stitch count ever will. And a machine that screams on thick fabric is telling you the truth about its frame.
How I picked and how I tested
The two machines below are the ones I would recommend to a beginner or a returning sewer who has denim, canvas, or upholstery weight fabric on the list. I judged them on the same criteria I use on everything: how the straight stitch behaves across a range of fabric weights, whether the tension responds predictably, what the buttonhole looks like on a scrap of the same thickness as the project, and whether I would trust the machine on a costume somebody paid for.
What separates them is not stitch count. It is the setup experience, what happens when a part wears out, and how much of the machine's behavior is handled by electronics versus a dial you can feel with your fingers. Both of those things matter more on thick fabric than they do on cotton.
The two machines I would set up this way
Either of these will sew a jeans hem. The question is which one suits how you work, and how much you want the machine to decide for you.
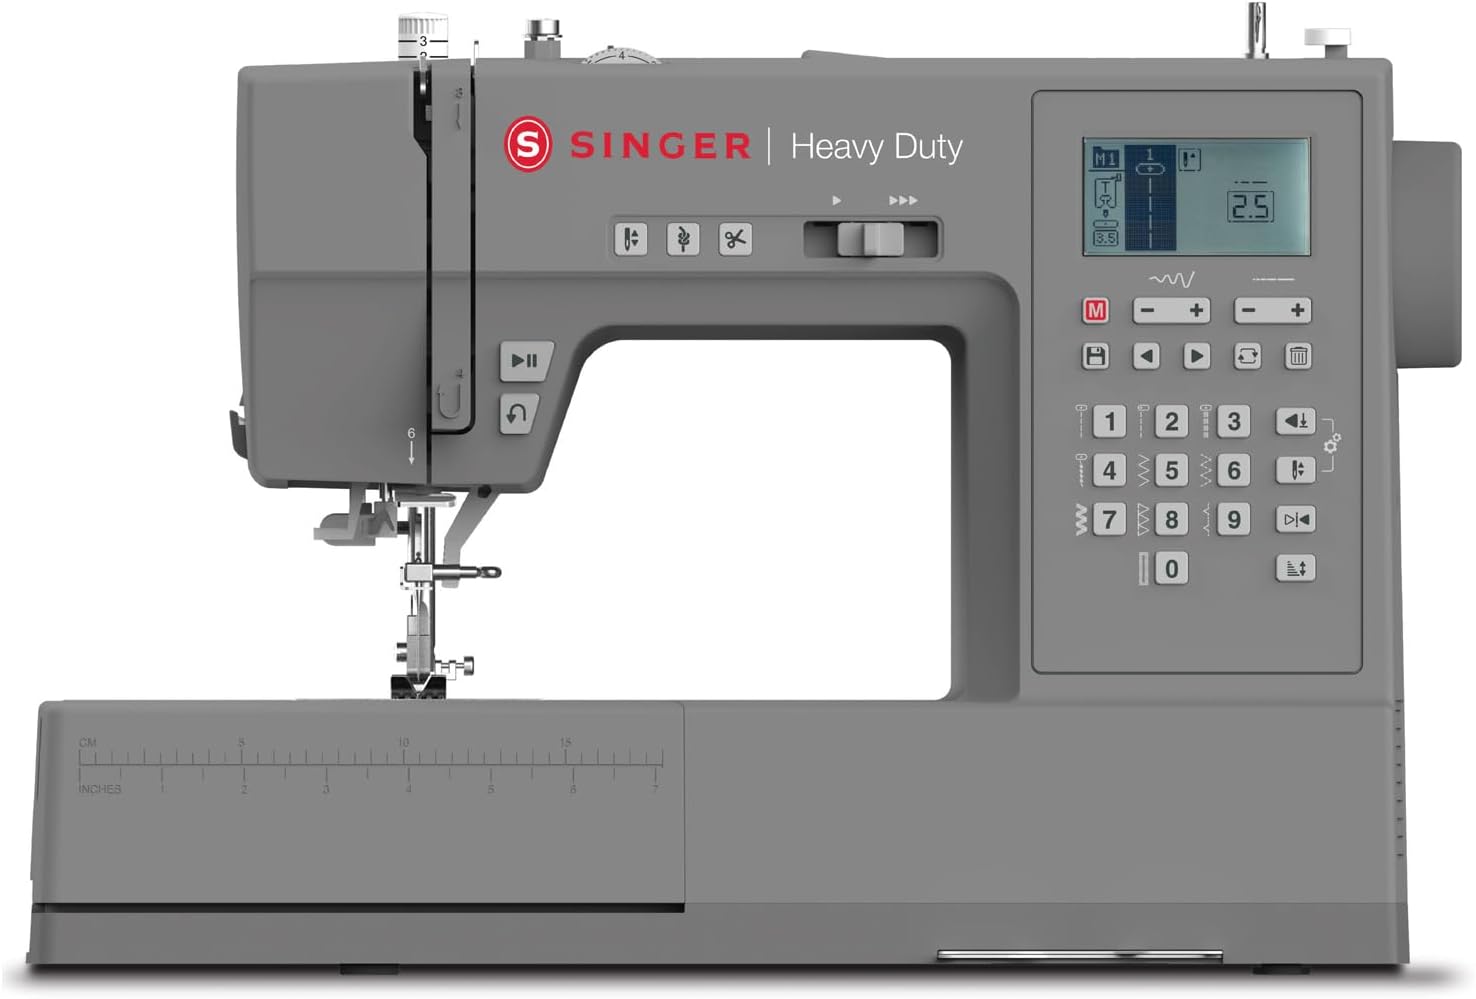
Budget pick: SINGER® 6800C Heavy Duty Computerized Sewing Machine with Accessory Kit
 Visit on Amazon →
Singer's modern lineup is not what the vintage machines were, and I will say that plainly. The HD series is the part of the current catalog I will defend. The 6800C is computerized, which in practice means stitch selection is push-button and stitch length holds more consistently than a mechanical dial that drifts as you sew. On a long denim seam, that consistency is worth something.
It also ships with an accessory kit, so before you buy separate feet, inventory what is in the box. Feet you already own are feet you do not have to order.
The part I would test first is the tension. Run a straight stitch on a scrap of your actual fabric and see whether the dial responds the way you expect. On any machine in this class, that is the setting you will live in, and it is the one that decides whether thick fabric sews or fights.
Check current Amazon price before you commit, because this class of machine moves around and the accessory bundle changes with it. A beginner who wants a machine that makes them want to sew tomorrow, and who sews denim a few times a month rather than every day, is the person I point here. The automatic needle threader is the known weak point on machines at this level. It works, and when it eventually stops working, you can still thread a needle by hand. Plan for that instead of being surprised by it.
Flaws but not dealbreakers: Computerized means a circuit board, and a board repair can cost a real fraction of what you paid. If you sew thick fabric daily, read the next pick instead.
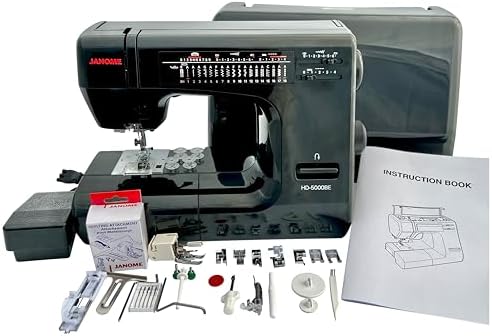
Upgrade pick: Janome HD-5000 Black Edition Heavy-Duty Sewing Machine
 Visit on Amazon →
Janome is the brand I recommend for garment sewing in the mid range, and the HD-5000 is the reason I keep saying it. The stitch quality is consistent, and the tension dials actually do something when you turn them, which is not a small compliment in a market full of dials that are decoration.
This is a mechanical machine. No screen, no stitch-selection board, no menu. That matters when the motor loads up on a thick seam, because there is no electronics package to fry and no board to replace when something goes wrong. The HD line is built around a heavier frame than the plastic-bodied machines wearing the same two words on the box, and the difference shows up the first time you sew through folded canvas.
Check current Amazon price, and compare it against what you would spend on a cheap machine plus a repair. For a garment sewer working with coating fabrics, denim, and structured costume pieces, this is the machine that makes the work predictable.
Flaws but not dealbreakers: Mechanical means you do the thinking. You will set stitch length and width yourself, and you will learn what your tension numbers mean. That is a feature for me and a frustration for people who want the machine to pick.
The actual setup workflow
This works on either machine, and it works on almost any machine with a decent frame. Do it in order. Do not skip to the sewing.
Step one: the needle. This is where most thick-fabric problems start. A needle that is too fine for the fabric deflects instead of piercing, and deflection is what produces skipped stitches and bent needles. For denim and canvas, move up to a 100/16 or 110/18 denim or heavy universal needle. For lighter weight fabric in the same project, go back down to an 80/12. Change the needle at the start of every project. They are cheap and they are the single most common cause of a machine that suddenly will not cooperate.
Step two: the thread. All-purpose polyester is fine for most seams, but if you want the heavy topstitching look, you need a thread that fits the needle eye and a tension setting that matches it. Heavy thread through a needle that is too small shreds and skips. If you run heavy thread in the top, keep the bobbin thread normal unless you are prepared to adjust the bobbin tension too. That is the one adjustment I would rather not make on a machine I do not own.
Step three: presser foot pressure. Thick fabric needs the foot to hold it against the feed dogs so the layers move together instead of shifting. Knits and silks need less pressure. If your machine has a pressure adjustment, use it. If it does not, you have found the first limitation of your machine on heavy fabric.
Step four: stitch length. Lengthen it. Short stitches on thick fabric perforate the fabric, weaken the seam, and make the machine work harder than it needs to. A longer stitch also looks better on denim, where a tight little stitch reads as homemade in the bad way. Backstitch less on heavy fabric for the same reason.
Step five: tension. Set it, then test it. Balanced tension means the knot sits inside the fabric and the seam looks the same on both sides. Loops underneath mean the top tension is too loose for the thread you are using. Loops on top mean the opposite. Turn the dial in small increments and sew a scrap between each adjustment. The dial should mean something, and on a machine worth keeping, it will.
Step six: the test seam. Sew a straight stitch on the actual fabric, in the actual number of layers the project uses. Then sew across a spot where a seam allowance crosses, because that lump is where machines fail. If the machine skips there, fix it there before you touch the real project.
Step seven: the buttonhole. Do one on a scrap of the same thickness. A buttonhole is the truest test of a machine's brain, and on heavy fabric it is also the test of the frame. If the buttonhole comes out uneven on a folded edge of canvas, the machine is telling you something about how it handles layers. Use a tear-away stabilizer under the scrap if the fabric wants to sink into the feed dogs.
Step eight: maintenance. Clean the bobbin area after every heavy project, because thick fabric sheds more lint than cotton does. Oil per your manual, not per a forum thread. And put a fresh needle in before the next project, because a needle that survived canvas has a tiny burr on it that will snag your next seam.
Where heavy-duty setups go wrong
Skipped stitches on thick fabric are almost never the machine's fault. They are needle deflection, too little presser foot pressure, or top tension that is too loose for the thread. Check those three before you decide the machine is broken.
Coated canvas and heavy interfacing are the two fabrics that humble machines. The coating grabs the needle, and the interfacing adds bulk without adding stability. Slow down and let the machine feed the fabric instead of pulling it. Pulling is how you bend needles and knock the timing out.
Do not judge a machine by its stitch count. A hundred-stitch machine uses about ten, and the rest are variations nobody sews. If the straight stitch is good and the buttonhole is clean, the count is marketing.
And if the machine screams on thick fabric, listen to it. That sound is the motor and the frame telling you what they are made of, and no setting will change it.
The competition and why it lost
A serger is a different tool, not a better one, and it does not replace a sewing machine. It finishes edges, and it will not sew a zipper. If you are building a costume shop, you eventually want both.
An industrial straight-stitch machine is a tank for seams and nothing else. If every single thing you sew is a long straight seam, nothing touches one. If you also need buttonholes and a zigzag, it is the wrong first machine.
The Brother CS7000X is still the machine I hand absolute beginners, and the Janome mid-range models are where I send garment sewers who want a step up without going mechanical. Bernina is worth the money if you sew professionally, and it is overkill for a hobby. None of them are the point of this article. This article is about getting whatever is on your table set up for the fabric you actually bought.
What this all costs
The machine is the smallest part of the number, which surprises people. Needles, thread, and the right feet add up fast, and servicing costs real money once a year if you sew hard. Budget for consumables separately from the machine so you are not choosing between a new needle and a new project.
Check current Amazon price on whichever machine you are considering, then add the cost of a pack of denim needles, a spool of heavy topstitching thread, and a walking foot if the machine does not include one. Those three items are what turn a machine into a machine that handles thick fabric.
On a machine you keep for five years, the difference between a bargain and the right pick works out to pennies a day. The setup workflow above is free, and it is the part that decides whether you enjoy the next five years.
Set the needle, set the pressure, test the seam, then sew the thing. That is the whole job.