Most people shopping for a sewing machine for beginners start with the stitch count printed on the box. That is the wrong end of the spec sheet. A 53-stitch machine uses maybe eight of those stitches, and half of those are decorative variations nobody touches after the first week. The number that actually decides whether you love sewing or quit by March is how the machine handles a plain straight stitch on the fabric you really sew.
I am Helen. I have been a costume seamstress for twelve years, I teach beginner sewing classes in Portland, Oregon, and I have sewn everything from Renaissance fair gowns to Halloween costumes for a school of 400 kids. Right now my dining table holds three machines and a serger. When a student asks what to buy, I give the same answer every time: buy the machine with the best straight stitch you can afford, then learn what the tension dial does. Everything else on the feature list is convenience stacked on top of that foundation.
So this is not a list of the most impressive machines. It is the process I walk beginners through: how to narrow the field, how to test a machine before you pay for it, and how to set it up so your first project does not end in frogging.
Why you should trust me
I keep a seam test journal. Every machine that comes through my hands gets sewn on five fabric types, at three stitch lengths, and through a buttonhole marathon before I form an opinion, and I write the verdict down. I have one rule I do not break: no verdict without a seam test on at least three fabric types. That is why you will not find a carelessly assembled top ten here, and why I will tell you plainly when a machine is fine for a hobbyist and wrong for paid work.
I also learned to read a machine from two people worth naming. The costume shop lead who taught me to read a pattern in minutes, and my grandmother, who sewed on a 1962 machine and made it last forty years. Neither of them cared about stitch count. Both of them cared about tension.
How I picked and how I tested
My test set is boring on purpose. Quilting cotton, linen, denim, jersey knit, and satin. Three stitch lengths on each: short for a seam start, medium for a standard seam, long for a basting pass. Then buttonholes, because a machine's buttonholes tell you more about its brain than its stitch count ever will. Then a thick seam, four layers of denim, and I listen.
What I listen for is whining. A machine that screams on thick fabric is telling you its frame flexes, and a frame that flexes will eventually throw your timing out. What I look at is the seam itself: does the stitch sit flat, or does it pucker. What I feel is the tension dial, because a dial that does nothing across three settings is a dial you cannot use to fix a bad seam.
This year I have been running those checks specifically on beginner machines and watching tension stability, because tension is the dial everyone touches and nobody understands. The two machines below are the ones I hand out at the end of a first class, for two different budgets and two different sewists. Run the checks yourself before you buy either one. My journal is not your fabric stash.
The two machines I hand to beginners
Two tiers. One for the person who wants to start this month without spending much, and one for the person who already knows they will sew for years.
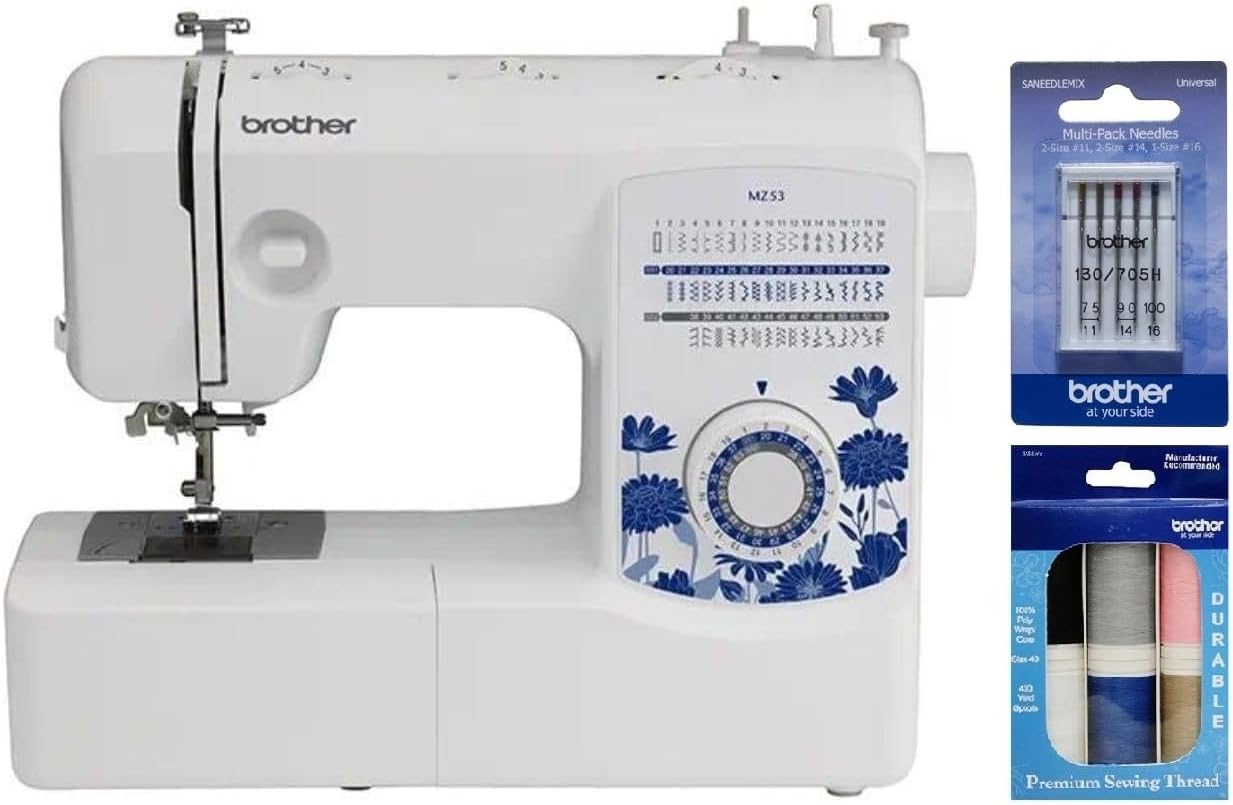
Budget pick: Brother MZ53 53-Stitch Sewing Machine, Premium Thread 6-Pack and Sewing Machine Needles 5-Pack
 Visit on Amazon →
The reason I put this one in front of a first-time student is not the 53 stitches. It is that the box arrives with thread and needles, which means the machine can be threaded and running the same afternoon instead of sitting in the closet until a second order shows up. That sounds small. It is not small. The most common thing that kills a beginner's momentum is a machine that cannot be used on day one.
Brother's entry machines are the ones I recommend most often to people who have never touched a sewing machine, because they do not fight you. The feed is predictable, the controls are labeled in plain language, and the learning curve is about your hands, not the manual. The 53 built-in stitches cover what a beginner needs, including the stretch stitches you want for knits and a blind hem you will want eventually. You will use maybe eight of them, and that is fine, because the other 45 cost you nothing.
Where it fits: quilting cotton, linen, light denim, basic garment seams, curtains, and kid costumes. Where it does not: four layers of upholstery fabric, or a daily production schedule. This is a first machine, and a good one.
Flaws but not dealbreakers: This is not an all-metal machine, so treat the heavy duty claim on any plastic-bodied machine with suspicion, including this one. If you plan to sew denim and canvas constantly, look at the next entry instead.
Anyone who wants to learn on a machine that cooperates, and who sews garments, quilts, and home projects in normal fabric weights, will be happy here.
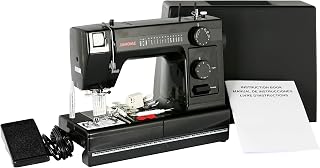
Our pick for garment sewing: Janome HD1000BE HD1000 Black Edition All Metal Body Sewing Machine, one size
 Visit on Amazon →
If you already know you will be sewing for years, this is the one I point at. Janome is my pick for mid-range garment sewing, and the reason is not a feature list. It is that the stitch quality stays consistent and the tension dials actually do something. When you turn the dial, the seam changes. That is the whole craft in one sentence.
The all-metal body matters more than the marketing on the box. A metal frame does not flex when you push four layers of denim or a canvas tote under the foot, and a frame that does not flex keeps its timing. That is the difference between a machine you keep for a decade and a machine that visits the repair shop in year three. I have watched too many hobbyists spend the cost of a good machine on repairs to a cheap one.
Where it fits: garment sewing, costume construction, denim hems, canvas bags, and anything where you want the seam to look intentional. Where it does not: it is not a quilting-specific machine with a huge throat, and it is not a serger, so it will not finish a raw edge with thread. Those are different tools and I review them separately.
Flaws but not dealbreakers: It is heavier than a plastic-bodied machine, which is a feature at the sewing table and a nuisance when you move it. And no machine in this class comes with every presser foot you will eventually want, so plan on adding a walking foot and a zipper foot down the line.
Anyone sewing garments, costumes, or bags who wants a machine they will not outgrow in two years should start here.
The workflow: how to test a machine before you buy it
This is the part most buyers skip, and it is the only part that matters. If you can get your hands on the machine, in a store or a friend's sewing room, do these in order. Twenty minutes, and you will know more than any review can tell you.
Step one: Name the fabric you actually sew. Not the fabric you dream about sewing. If you make quilts, you need a large throat and a walking foot. If you make garments, you need a good straight stitch and a buttonhole you can live with. If you make costumes, you need something that will not whine when you push through six layers of taffeta and interfacing. Write it down before you shop, because the sales floor will talk you out of it.
Step two: Set a floor, not a ceiling. The cheapest machine in the store is often the most expensive machine you will ever own, because you will replace it. Set the minimum you can spend and still get an all-metal frame if you sew anything heavier than quilting cotton. Then stop.
Step three: Bring your own fabric. This is non-negotiable. A machine that sews beautifully on the store's stiff demo fabric can choke on the jersey knit in your closet. Cut four strips of what you really sew and bring them.
Step four: Run the straight stitch at three lengths. Short, medium, long. Look at the stitches from the front and the back. A balanced stitch looks the same on both sides. If the top thread is pulling to the bottom or the bobbin thread is looping on top, the tension is off, and you want to know that before you own it. Stitch quality is the whole game. Everything else is convenience.
Step five: Turn the tension dial and watch what happens. Move it two numbers in each direction and sew another seam. If the seam changes, the dial works and you can fix problems yourself. If nothing changes, walk away. A machine with a decorative tension dial will send you to a repair tech for problems you could have solved in ten seconds.
Step six: Sew a buttonhole. Sew one on a scrap of your fabric with a scrap of your interfacing. If it comes out uneven, or the machine stalls halfway, that is the machine's brain showing you its limits.
Step seven: Push a thick seam through it. Fold your denim or canvas into four layers and sew over it slowly. Listen. Whining means frame flex. Stalling means the motor is undersized for what you want to do. Either one tells you this is not the machine for heavy work, no matter what the box says.
Step eight: Check the needle threader and the bobbin. Automatic needle threaders break. The question is not whether it breaks, it is whether you can live without it when it does. Learn to thread the needle by hand on the machine you are considering, and load the bobbin yourself. If either one makes you want to give up, that is your answer.
Step nine: Count the feet, not the stitches. You want a general purpose foot, a zipper foot, and a buttonhole foot at minimum, plus a walking foot if you quilt. Check what is standard and what is sold separately, because accessories add up fast.
Step ten: Buy the boring machine. The machine with the fewest computer features and the best mechanical stitch quality is the machine you will still be using in ten years. Computerized features are wonderful until the circuit board dies and the repair costs half the machine. Buy the boring one and spend the difference on fabric.
The competition and why it lost
A few machines come up in every beginner conversation, so here is where they land for me.
The Brother CS7000X is the best beginner machine, full stop, with 70 stitches and a straight stitch that does not fight you. If you want more stitches than the Brother MZ53 offers and you are willing to pay for them, that is the upgrade path.
Janome's mid-range lineup is where I send garment sewists, and the HD1000BE is the entry point into that world. The tension behaves, and the stitch quality holds across a long seam.
Singer's modern machines are a shadow of the vintage ones. The HD series is okay. The rest are disappointment with a brand name attached, and I say that as someone who restores vintage Singers and loves them. Bernina is worth the price if you sew professionally, because the stitch quality and resale value justify it, but for a hobbyist it is overkill. Juki's straight-stitch machines are industrial tanks, and if you only sew seams and have the space, nothing touches them. They are also not beginner machines, and they do not do buttonholes.
What this all costs
I am not going to quote prices here, because prices move and a stale number is worse than no number. Check current Amazon price on both machines above and do the math yourself. What I will tell you is where the money goes.
The Brother bundle saves you a separate thread and needle order, which matters more than the amount suggests, because it means the machine runs on day one. The Janome costs more because you are paying for the metal frame and the consistency, and that is money you do not spend again on repairs or on a replacement in year three.
Then there is the money people forget. Presser feet, a walking foot if you quilt, bobbins, a decent pair of shears, and a seam ripper you will use more than you expect. A first-year sewing budget is never just the machine. The good news is that the accessories are one-time purchases that follow you to the next machine.
The cheapest way to spend money on this hobby is to buy the machine with the best straight stitch you can afford, once, and then learn to use it. The most expensive way is to buy cheap, get frustrated, and buy again.
The short version
Name your fabric, set a floor on the budget, bring your own scraps to the test, and judge the machine on the straight stitch, the tension dial, and the buttonhole. If those three hold up, the stitch count does not matter.
Your first machine should make you want to sew tomorrow. That is the real spec. Everything else is marketing.